
Today we'll discuss how to make the Sign-Up and Sign-In process easier for your SaaS apps when using Okta. I'll show you how to support 3rd party digital identites when using Okta. We'll discuss the options at your disposal & then I'll show you how to enable them in your cell.
This is a follow up from my last post where we discussed how to start your journey with Okta. I've added a link in the description below. Check it out.
And again, this is from the point of view of a developer. A developer, wanting to bring a web-based SaaS apps to the market and wishes to make the user expeirence as seamless as possible.
So let's get into it ... (also if you'd prefer to watch this on youtube click the link below.)
Your Options
Let's start by discussing your options ...
When you use IDaaS providers like Okta as the user store for your applications, your users can:
- sign in with their email and password. This is where the identity is managed by your Okta cell.
- alternatively, your users can choose to sign-in with an external identity provider like Microsoft, Google, Facebook or Apple. This is called Social Login or Social Authentication. I mean, why force your users to remember yet another username & password when they can log in with an external identity provider that they already trust.
- And the other option at your disposal is to use inbound federation or inbound SAML. This is where you allow your users to sign in with other identity providers that support OpenID Connect or SAML protocols. This way you can let your users sign in with identity provided for example their corporate networks as long as they support the aforementioned protocols.
Now, depending on your use-case, you could use one of theses approaches or multiple of them at the same time. You can also let you define logic to determine which Identity Provider individual end users are routed to when they authenticate. This is accomplished by routing rules.
So as a practical exercise what we'll do today is ..
- I'll walk you through the steps involved in allowing self service registration.
- We'll enable users to Login with Microsoft and Office 365 as the service provider and use OpenID Connect (oidc) to enable the integration.
- We'll run an app locally & play with routing rules to direct the method of signing in.
So let's get into the fun techie bits .. yay!
Self-service registration (SSR)
Self-service registration (SSR) lets users use a custom app or the Okta Homepage to self-register. After you enable SSR, a Sign up link appears in the Okta Sign-In widget. Users who select this link are directed to a new Create Account registration form based on a customized registration policy.
Let's see this in action ...
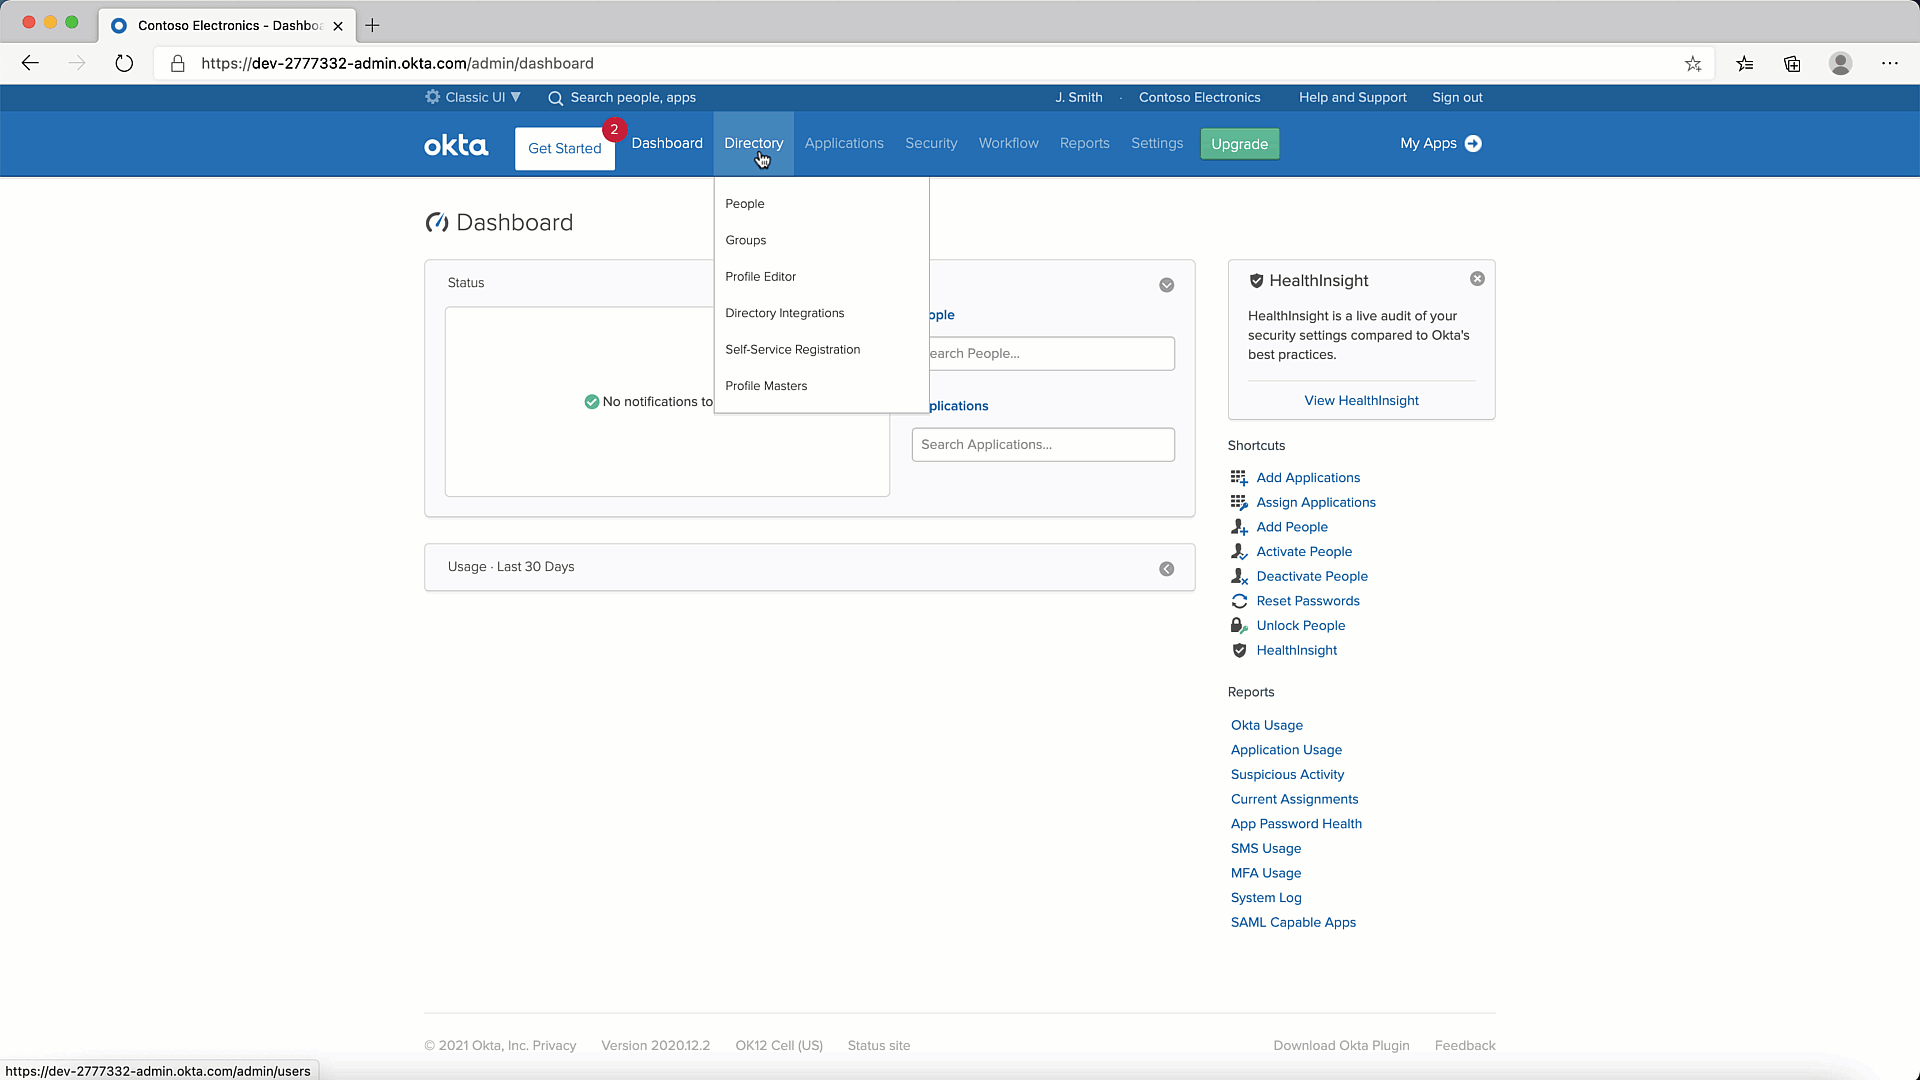
To enable this, navigate to Directory then Self-Service Registrations and click Enable Registration. Remember that this is the Menu Option for the "Classic UI".
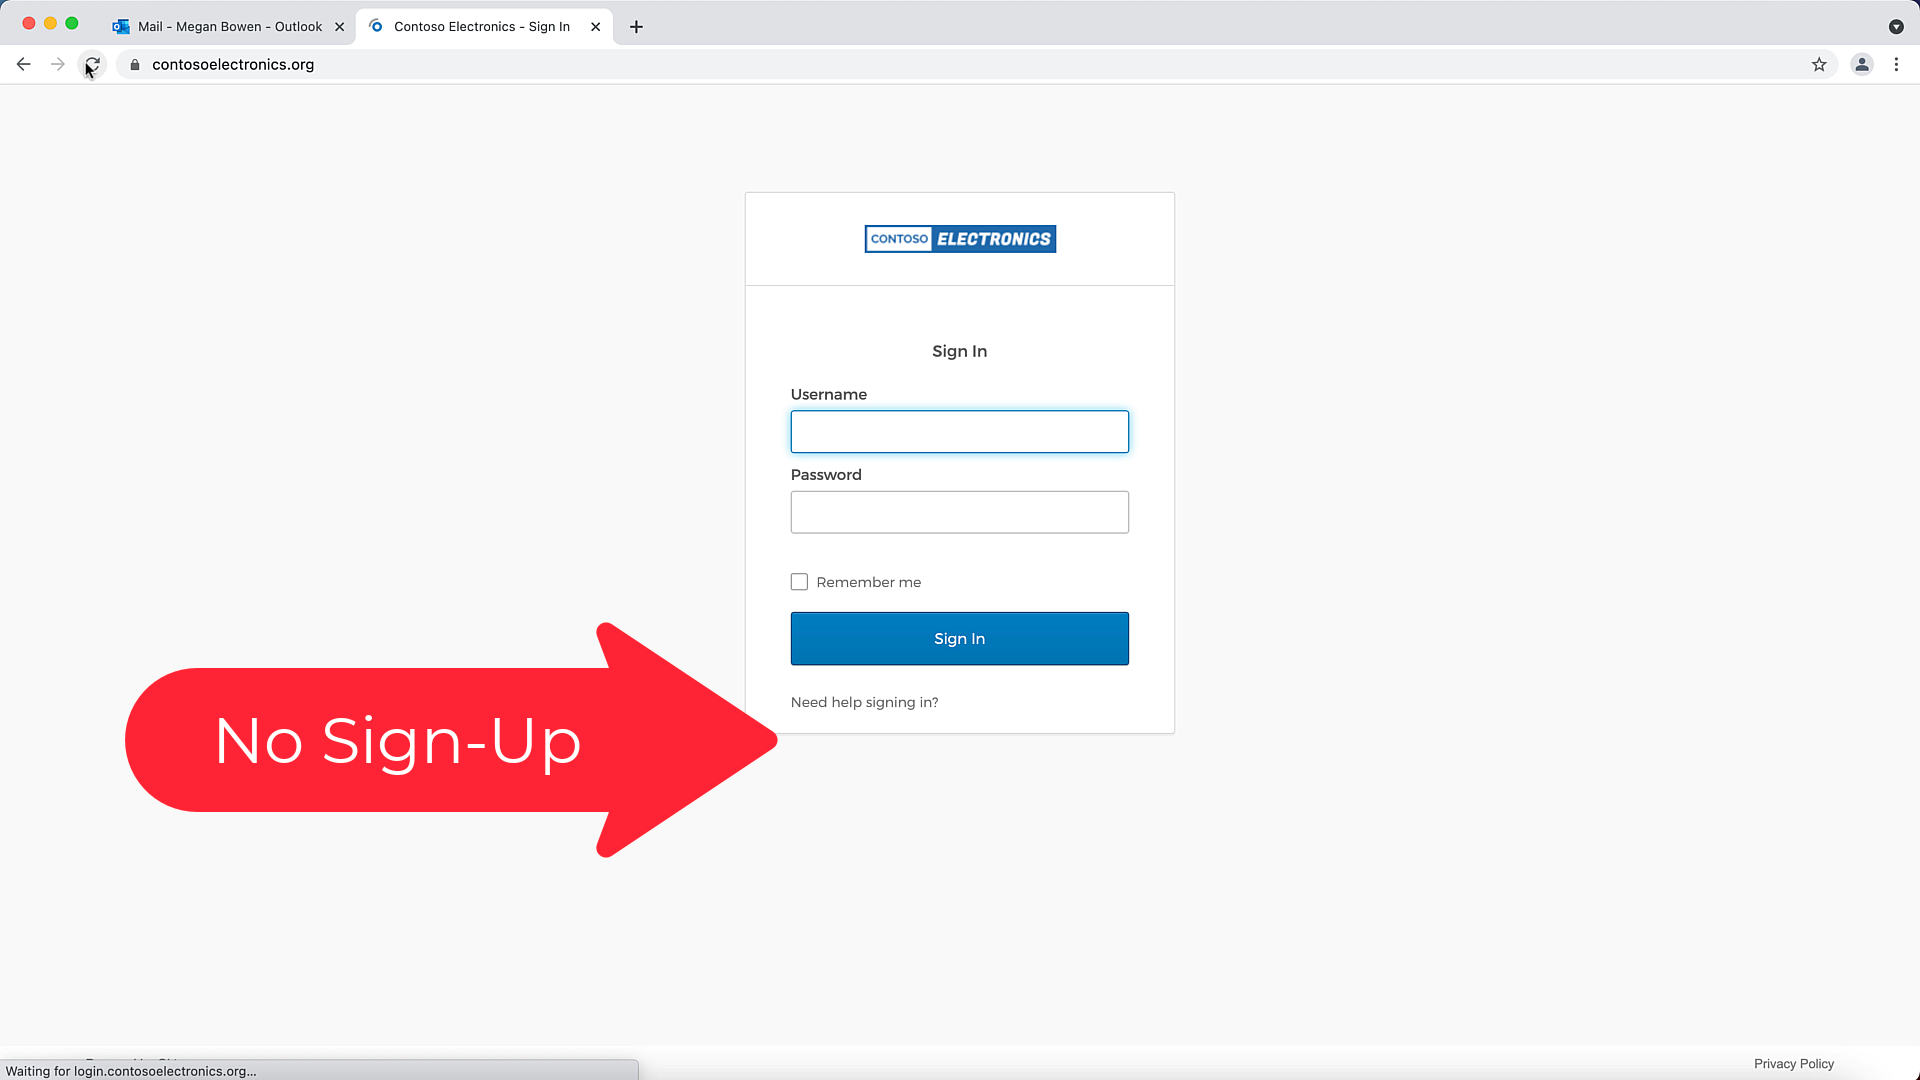
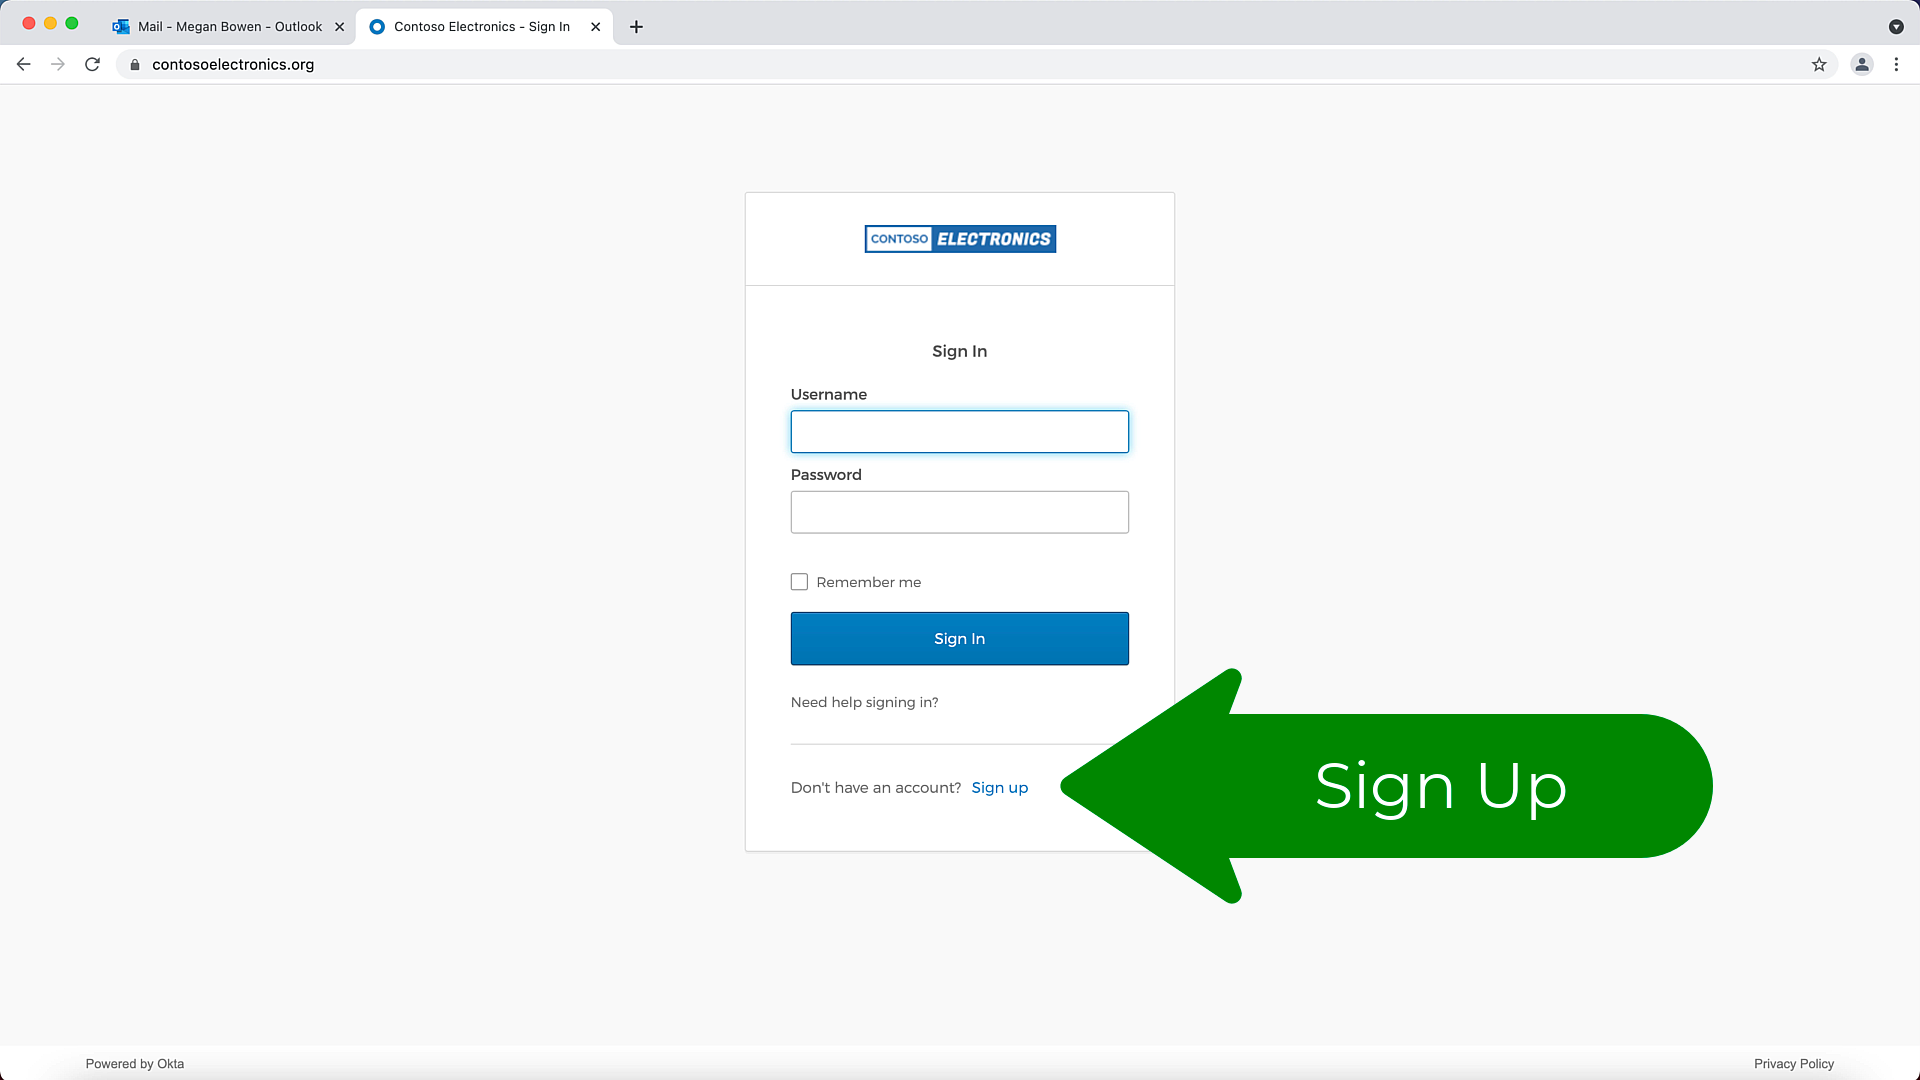
Once enabled, you should be able to see a link for "Sign Up" on your login page.
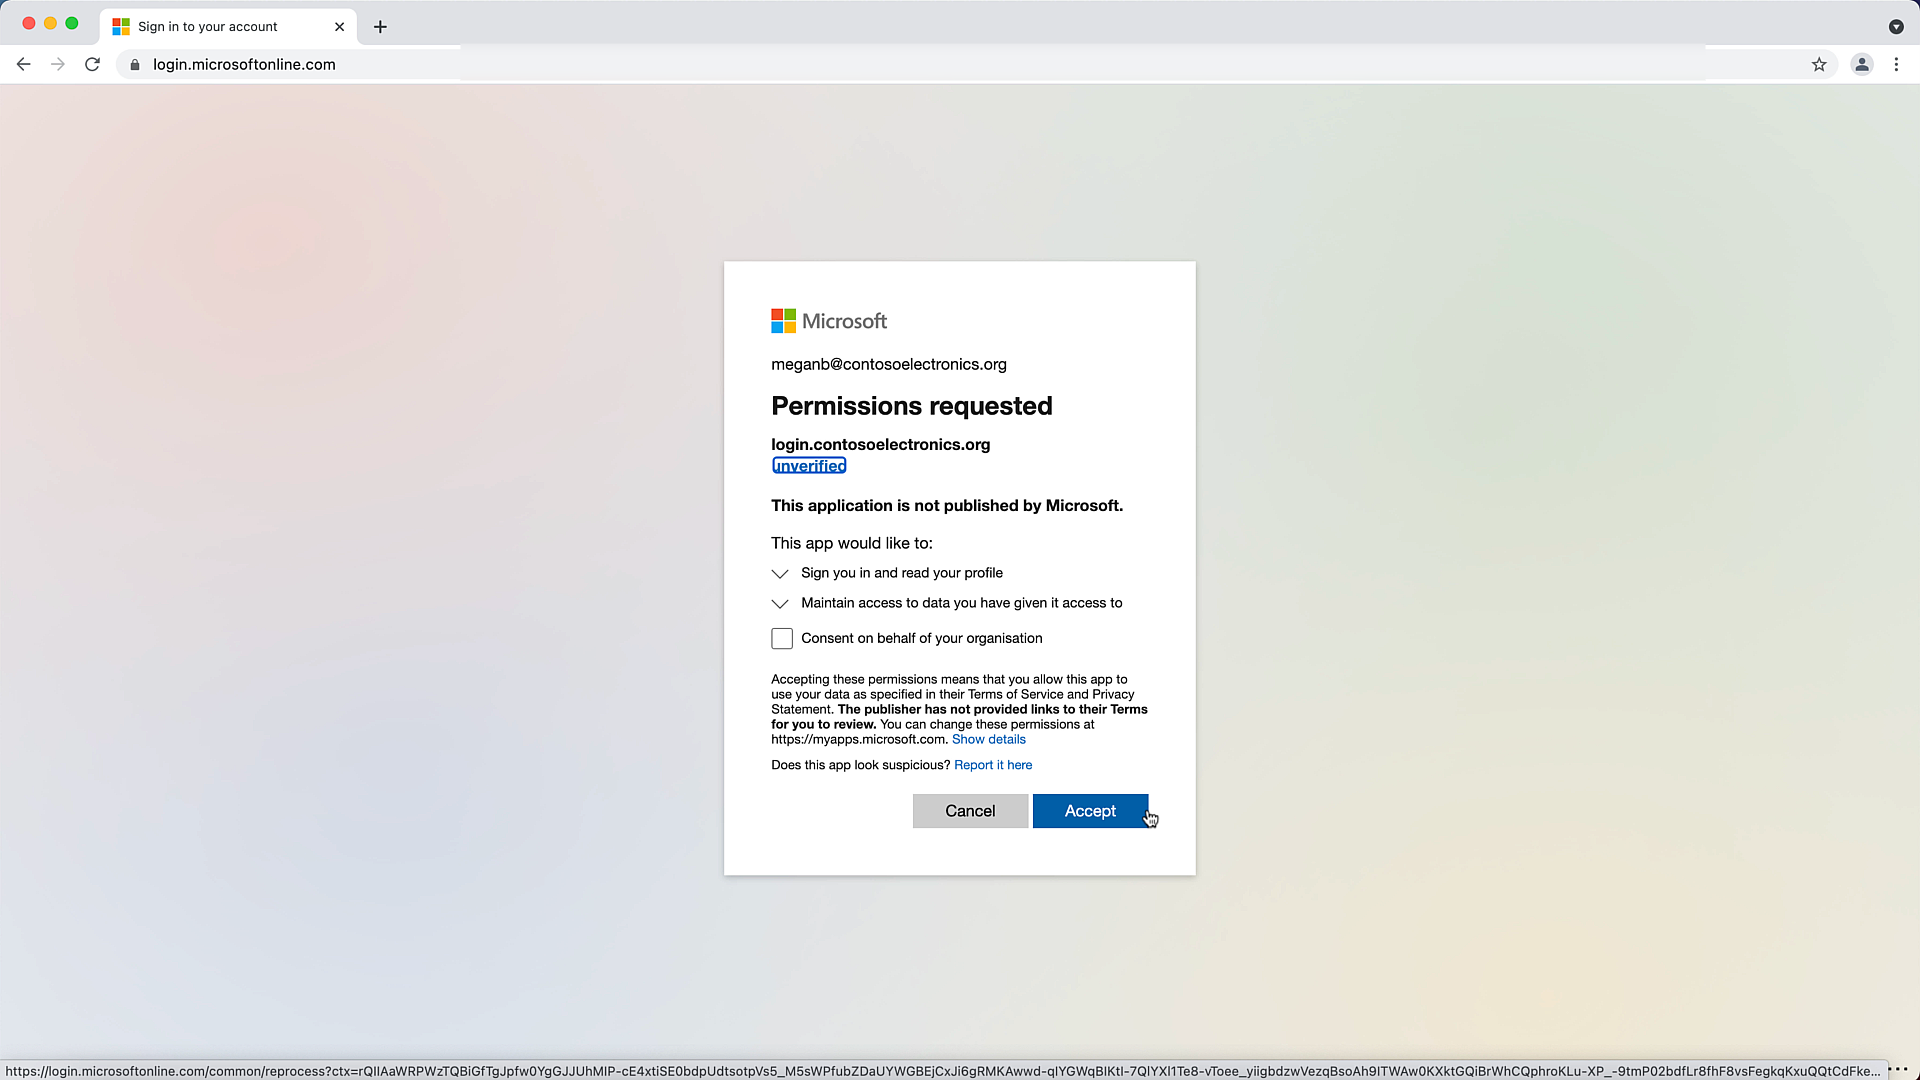
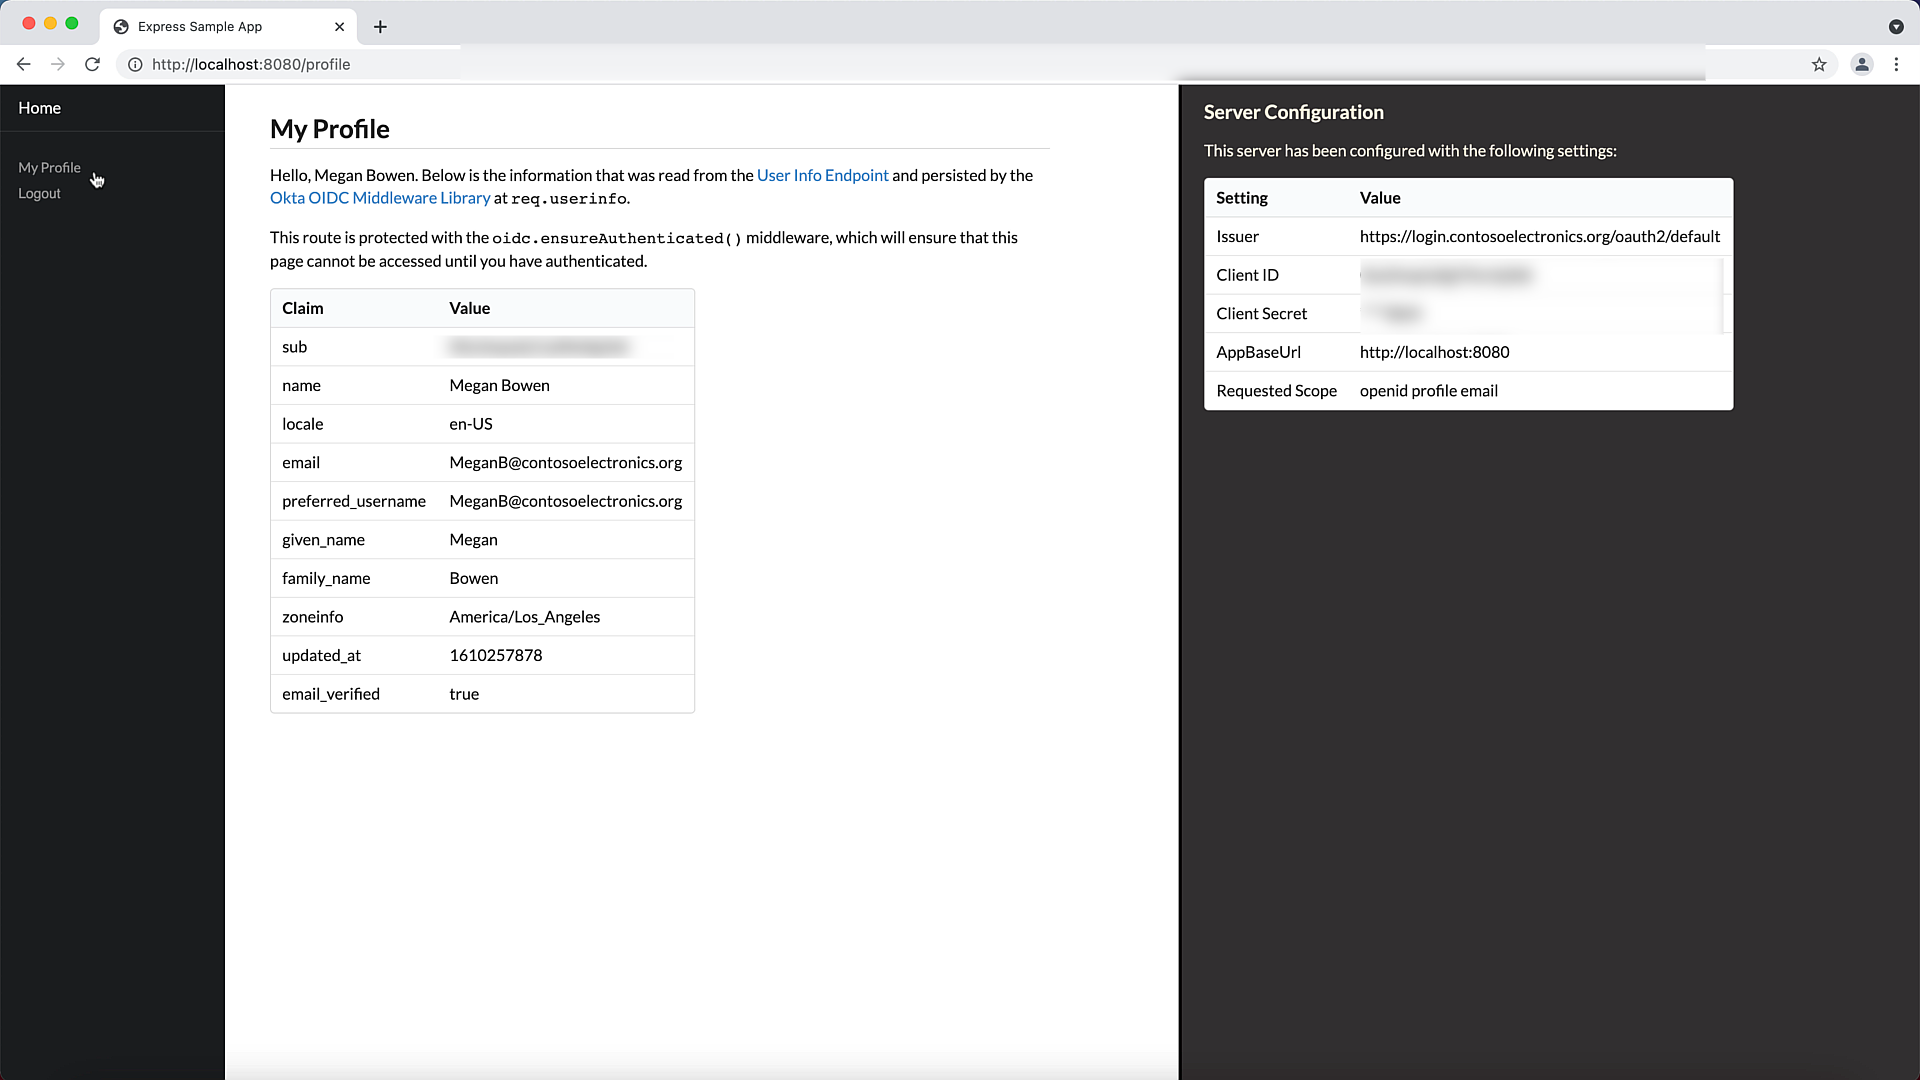
Login with Microsoft & Office 365 accounts
Now let's see how to allow your users to sign in with thier own Microsoft & Office 365 accounts.
To enable this, you will need an Azure Subscription.
Step 1: Open Azure Portal
We'll start by signing into the azure portal & opening up Azure AD. Here we choose the option to Add an App Registation as shown below.
To create one you need 3 things, namely:
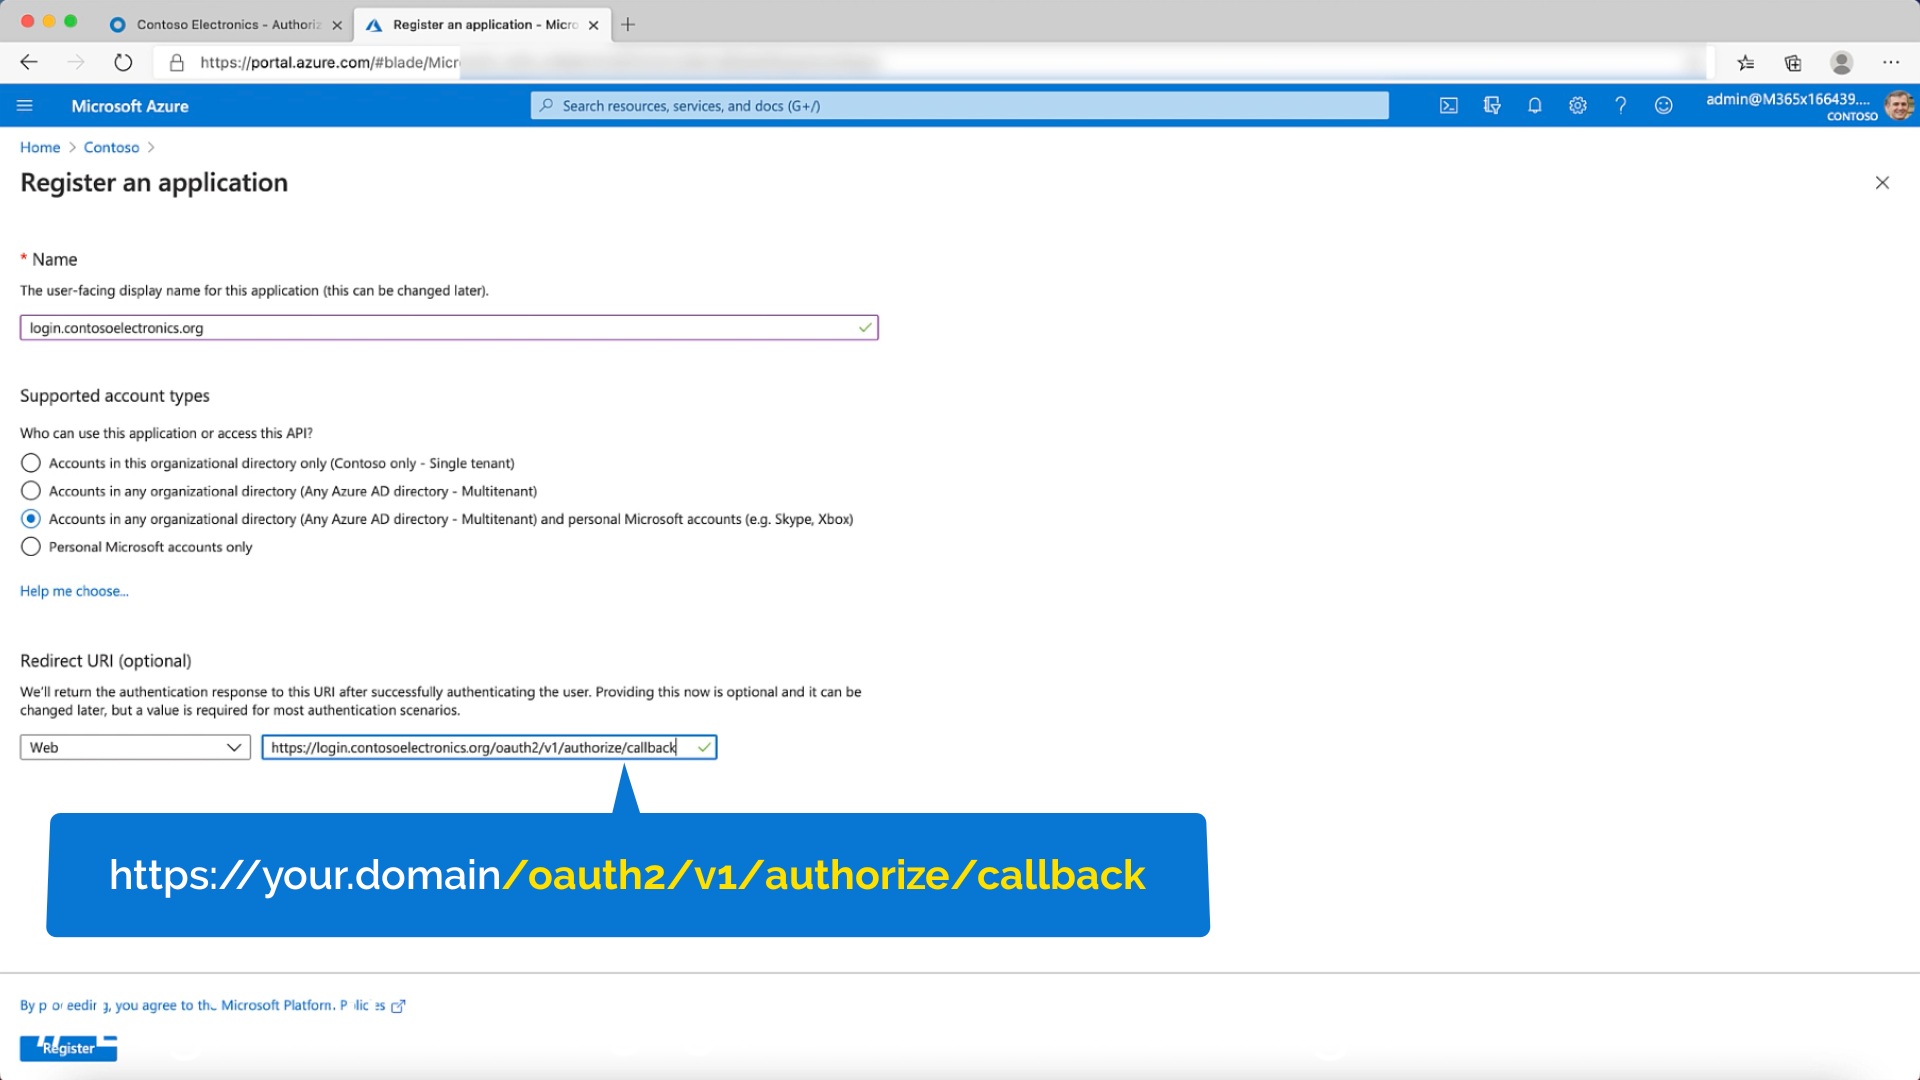
- A name, in my case I'm using login.contosoelectronics.org
- Choose the option that suit you. I wanted to enable logins for Microsoft accounts as well as Office 365 accounts for any organisation.
- We need to add the Redirect URL to point to our Okta tenant. This will be your hostname followed by the path
/oauth2/v1/authorize/callback
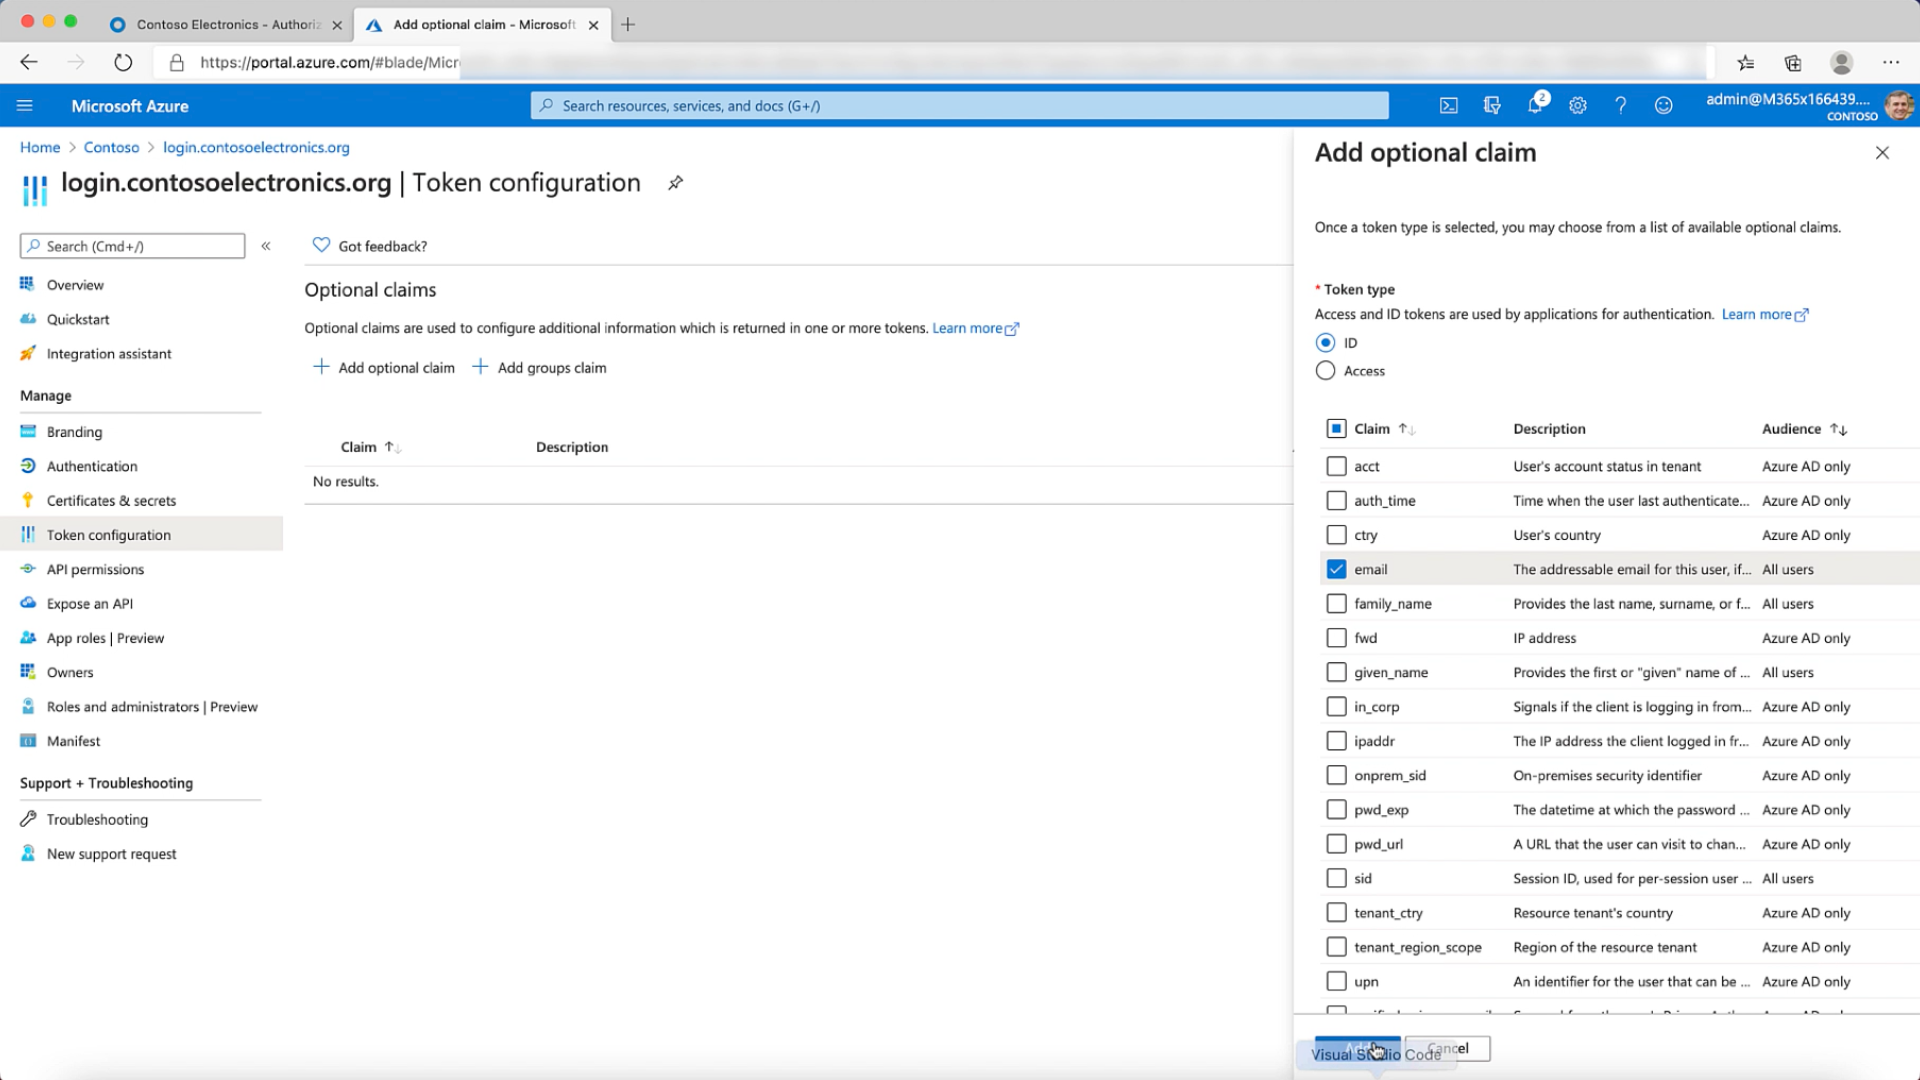
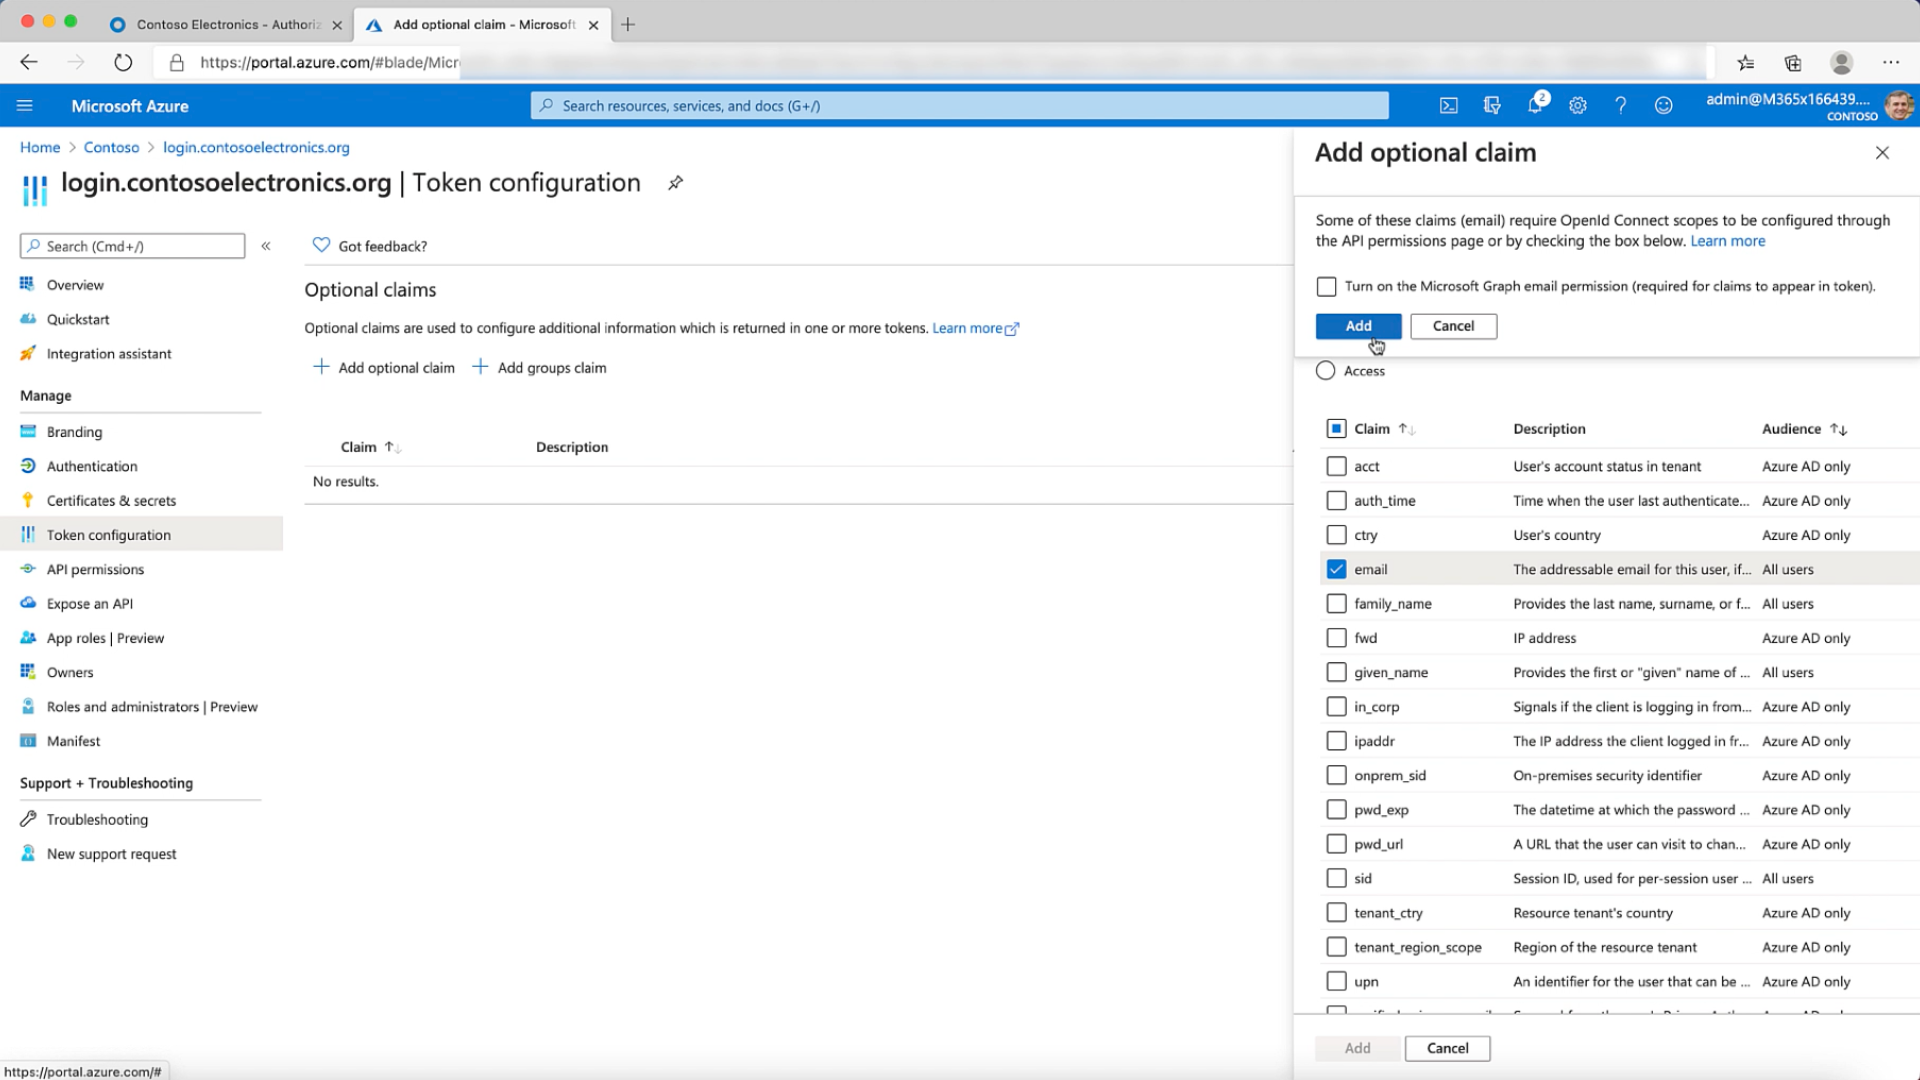
- You now need to Configure your Token & add optional claims. We'll add the email claim & also the OpenID connect scopes.
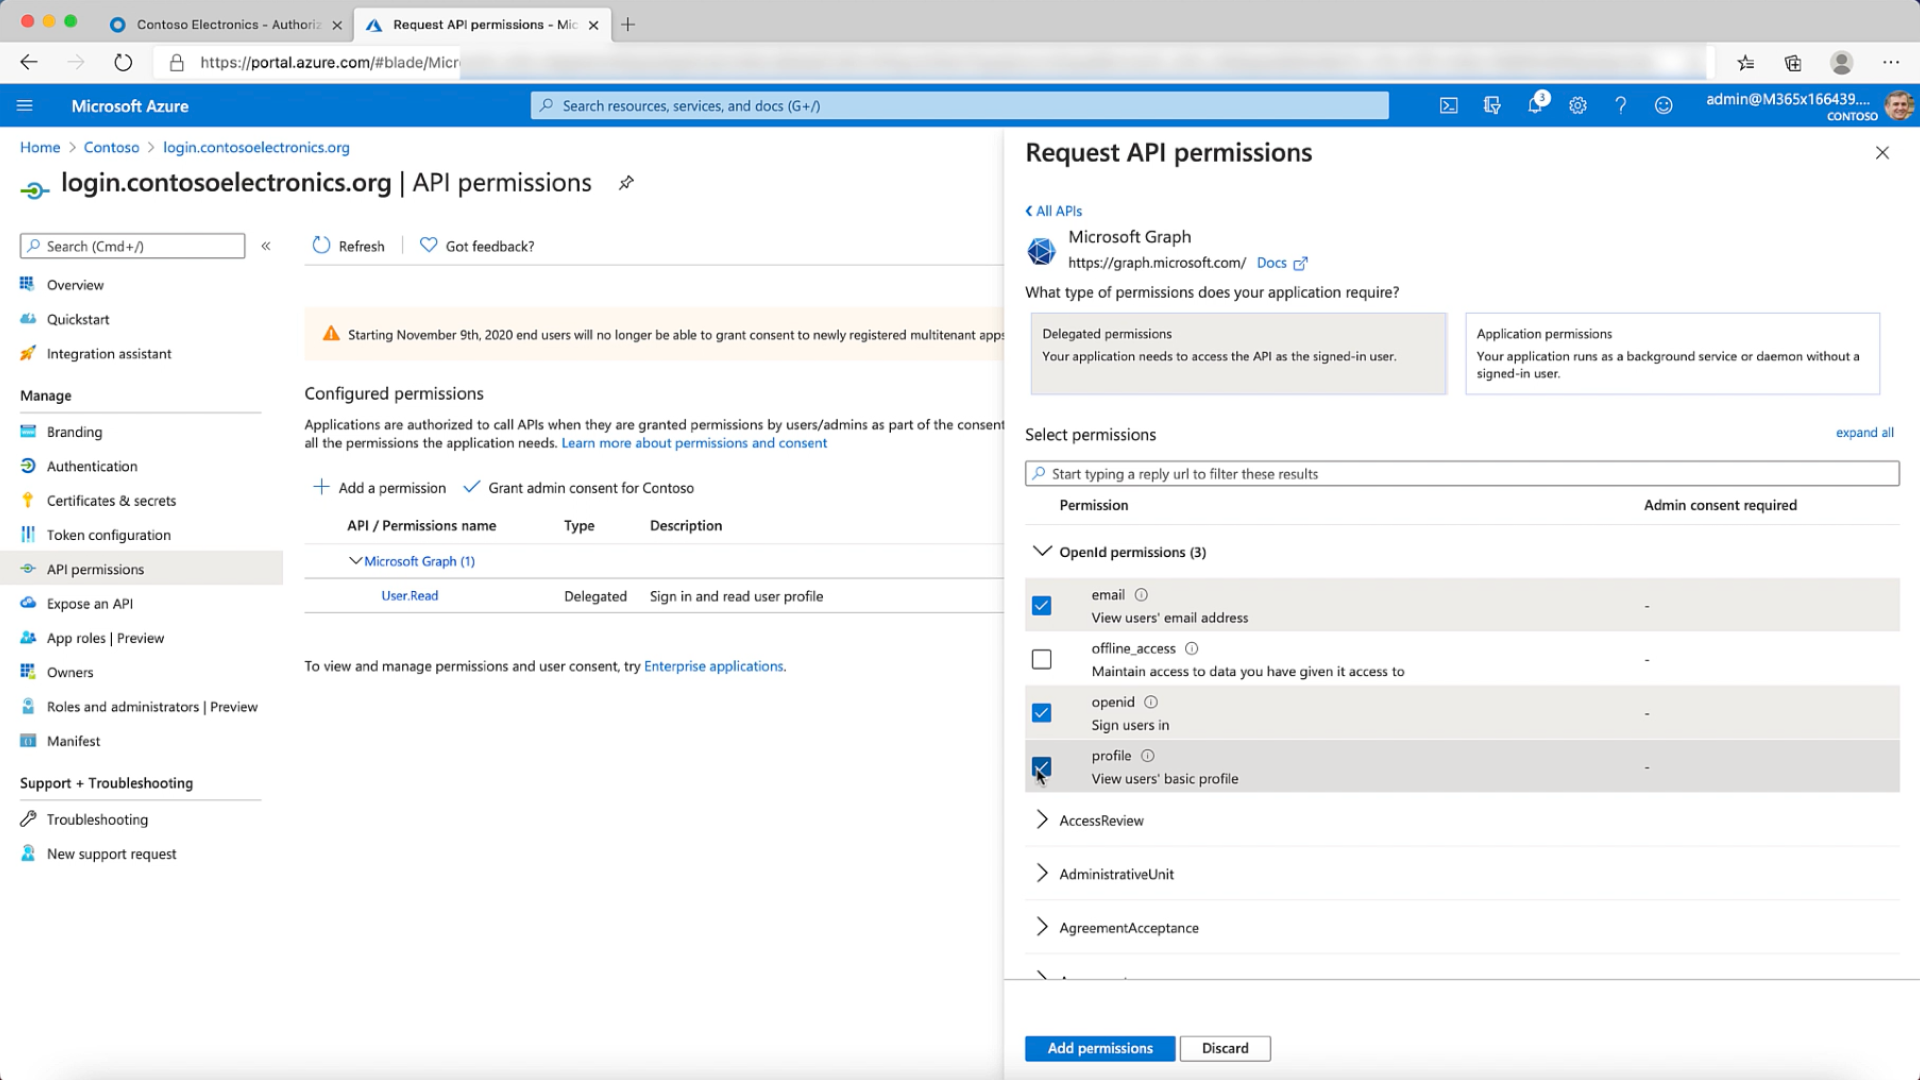
- We now configure the API permissions. Here we'll use Microsoft Graph & add delegated permissions for the following OpenID Connect scopes; email, profile, openid.
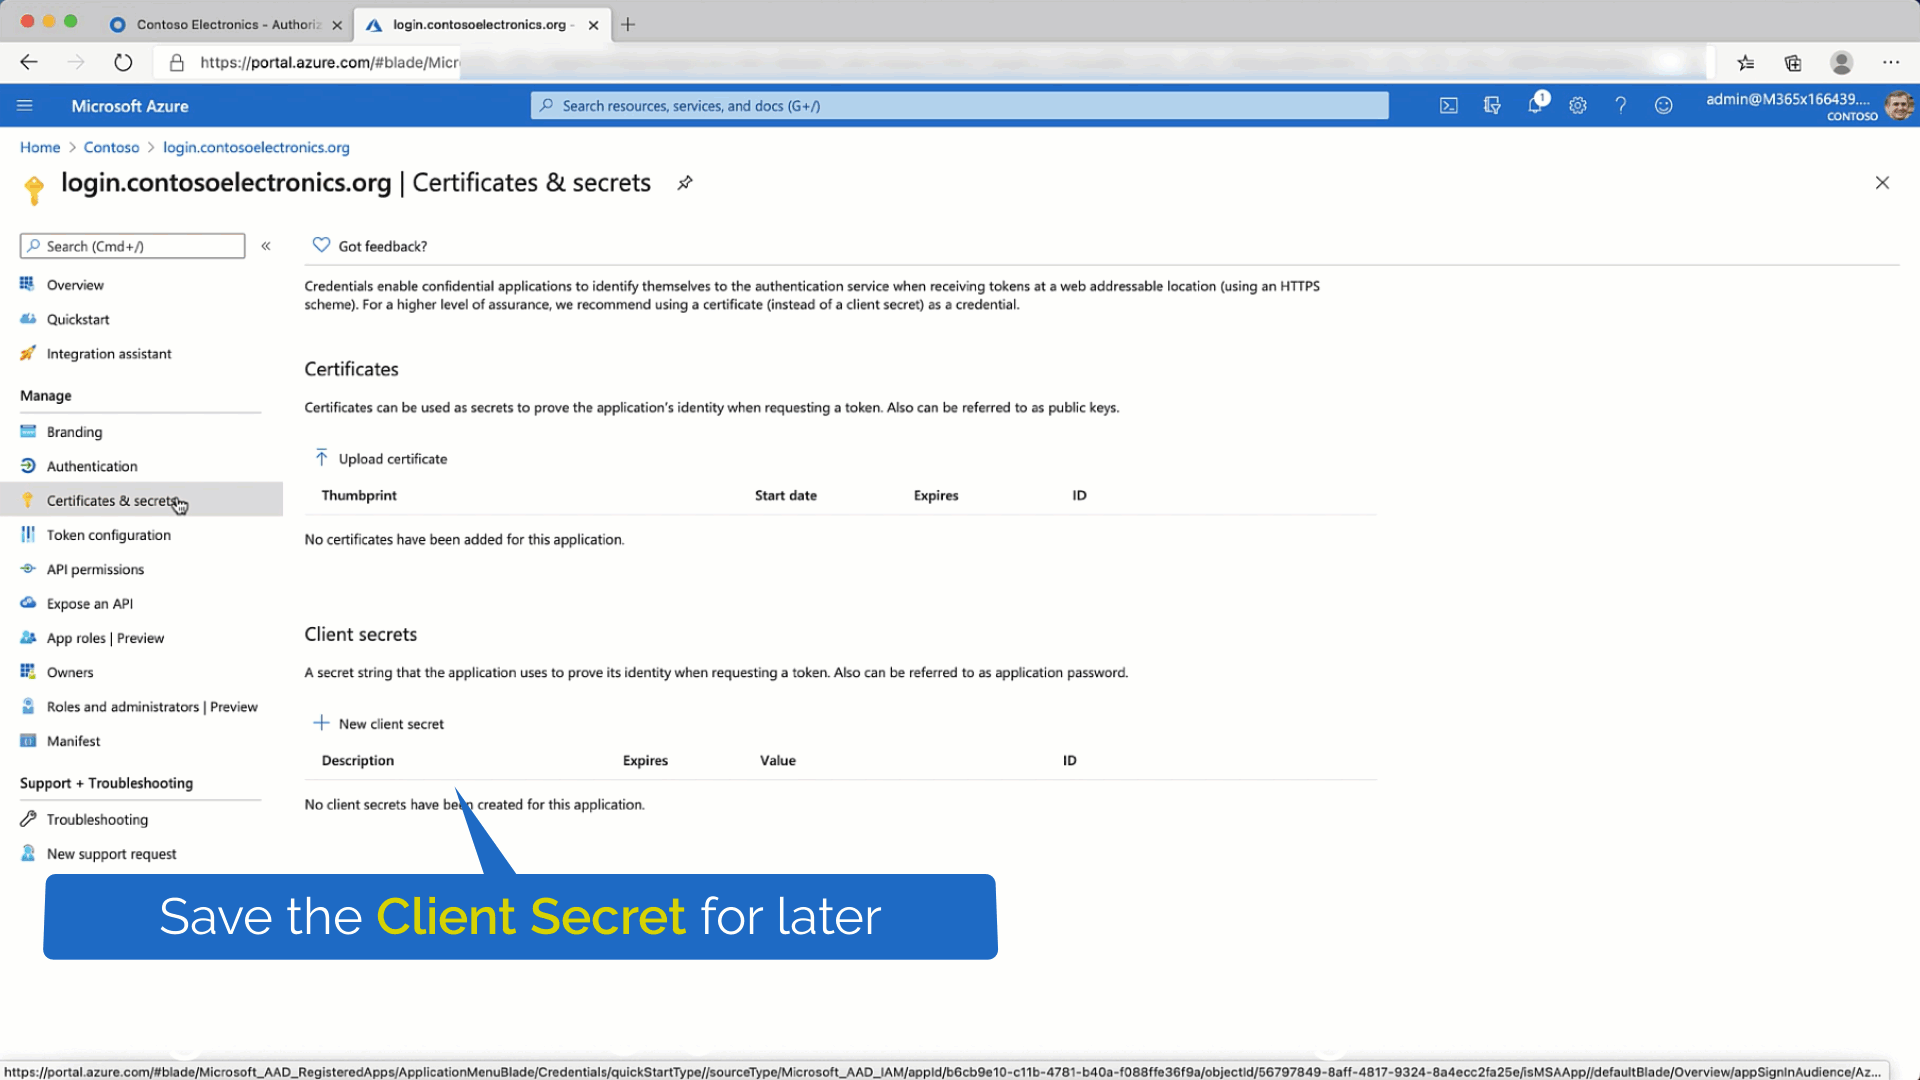
- Now add a client secret. Remember to copy this, you'll need it later.
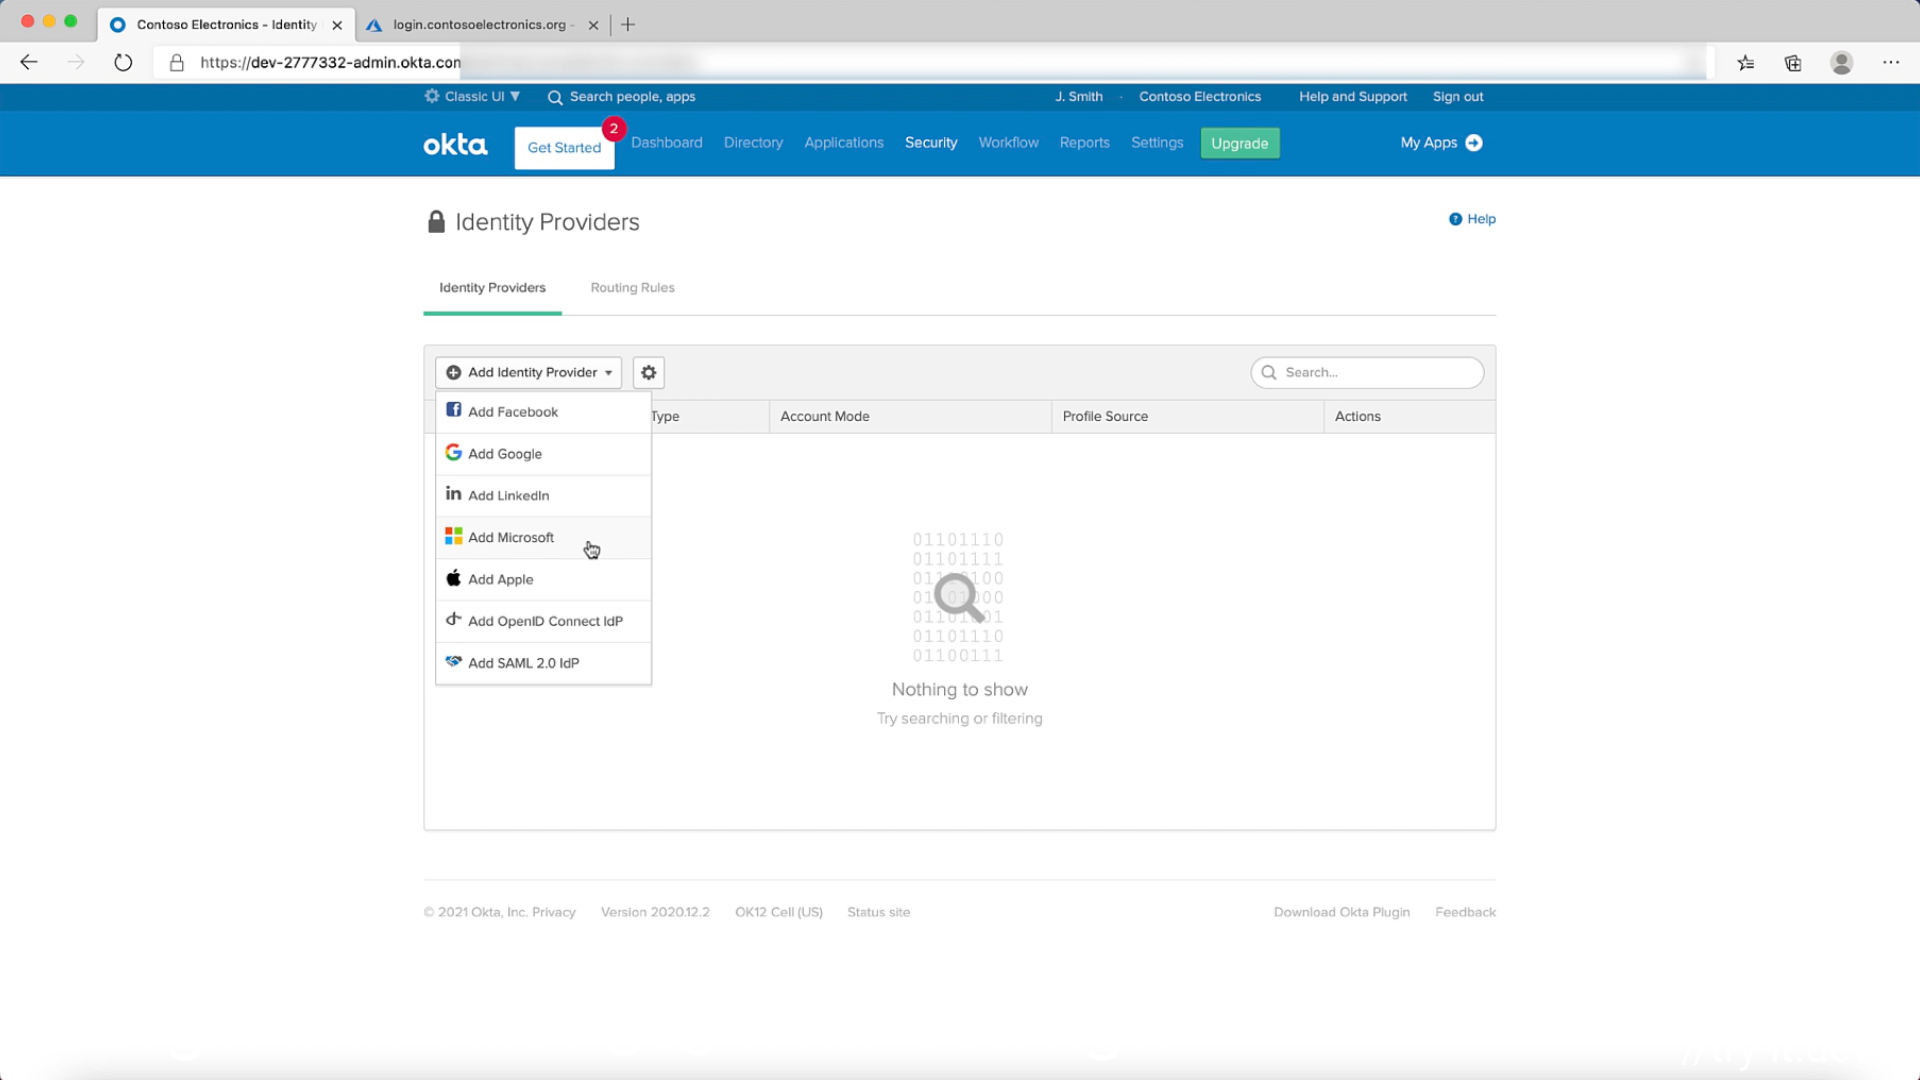
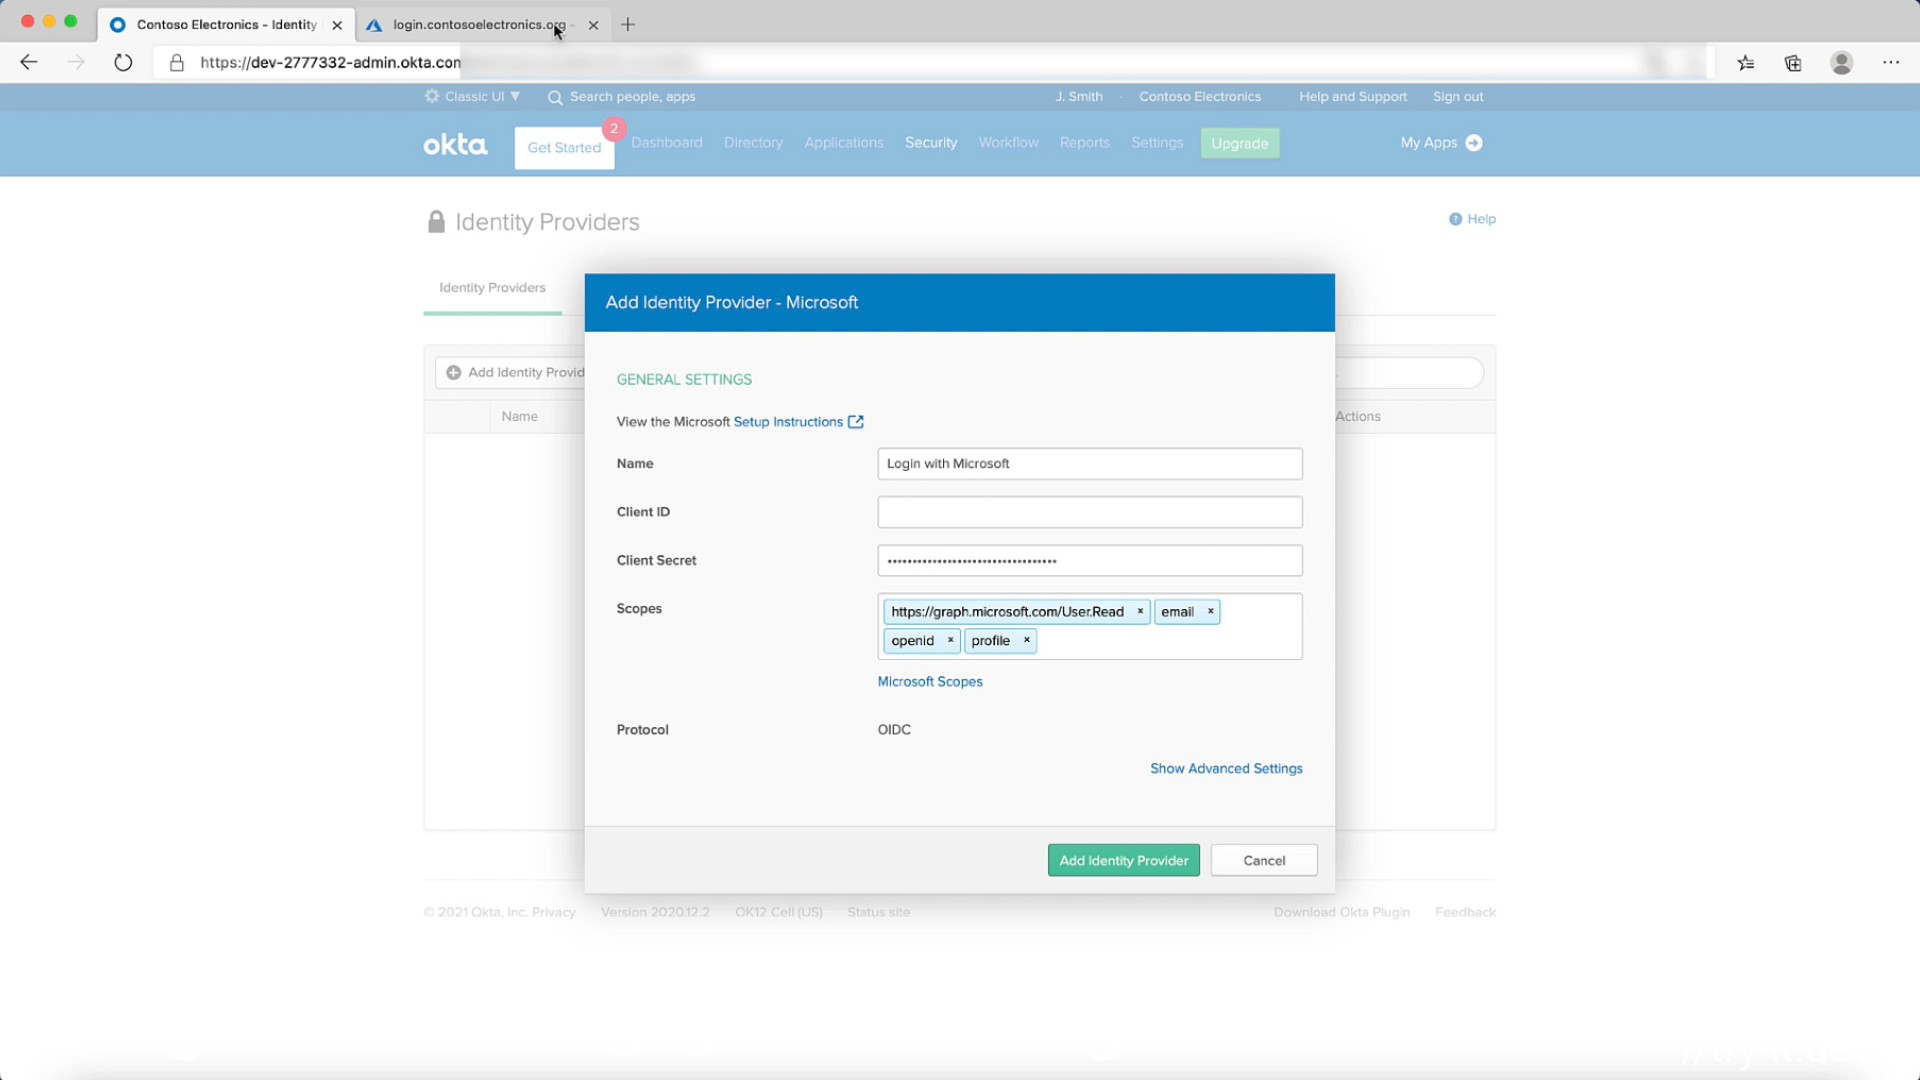
- Now its time to add an identity provider in your Okta cell. Most of the details are pre-populated. Add the client secret from the previous step & add the client id from the Overview page of your app registration then press save.
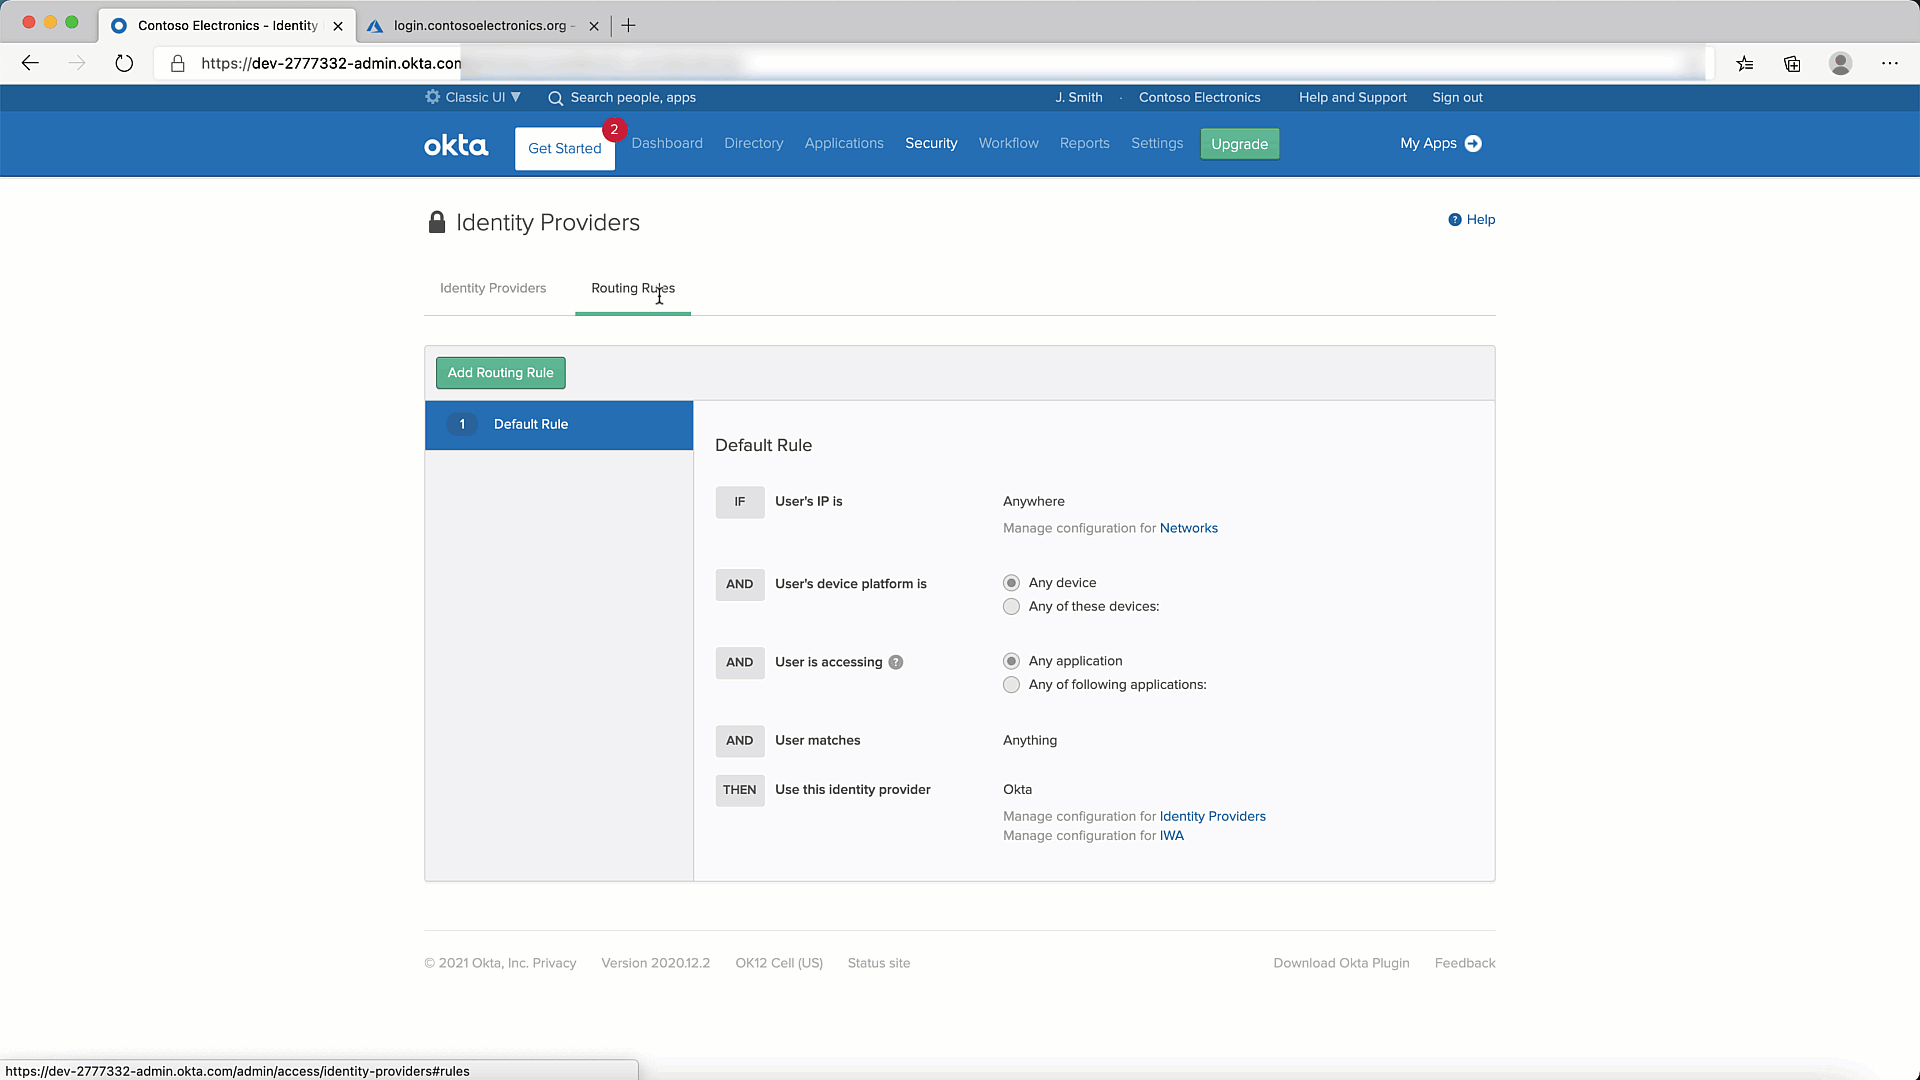
- Lets add a Routing Rule. You can do so as shown below:
- Finally, lets test it to make sure it all works.

I hope this expedites your journey with Okta. Happy coding ya'll.
References